Posts

Showing posts from March, 2021

Day 8 - Catherine

Image
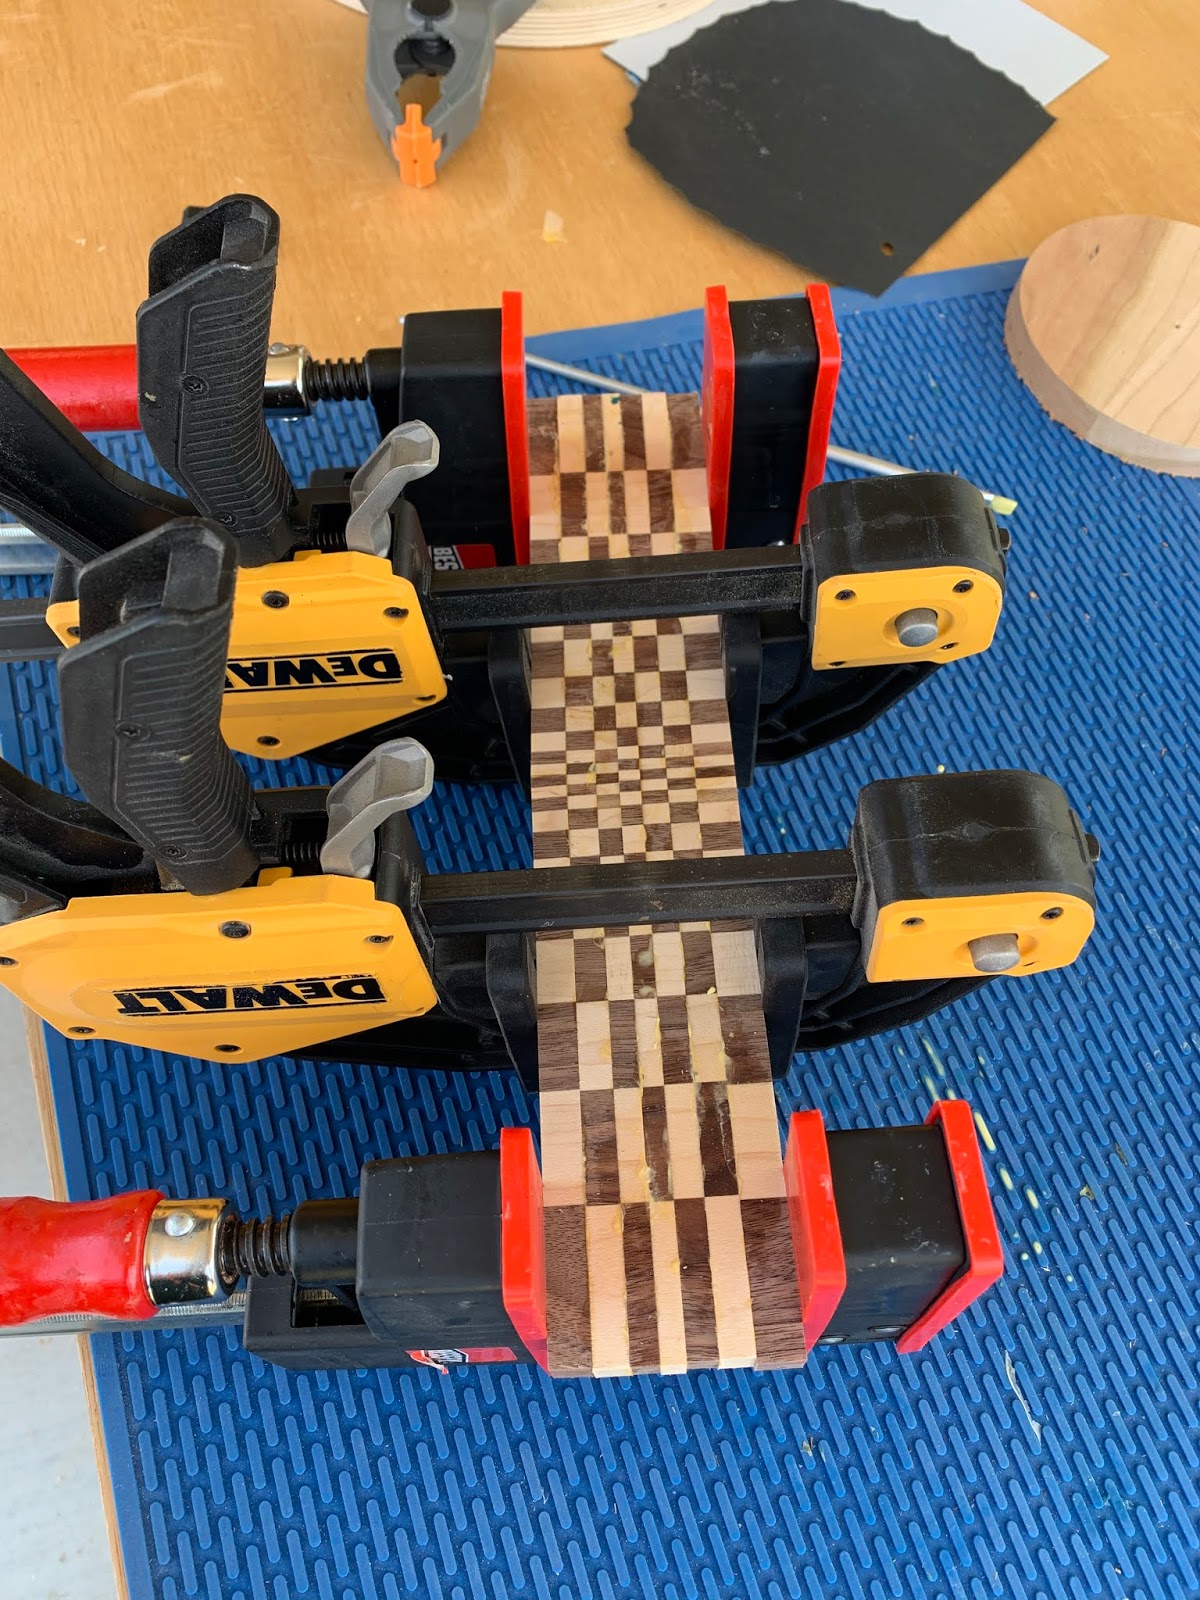
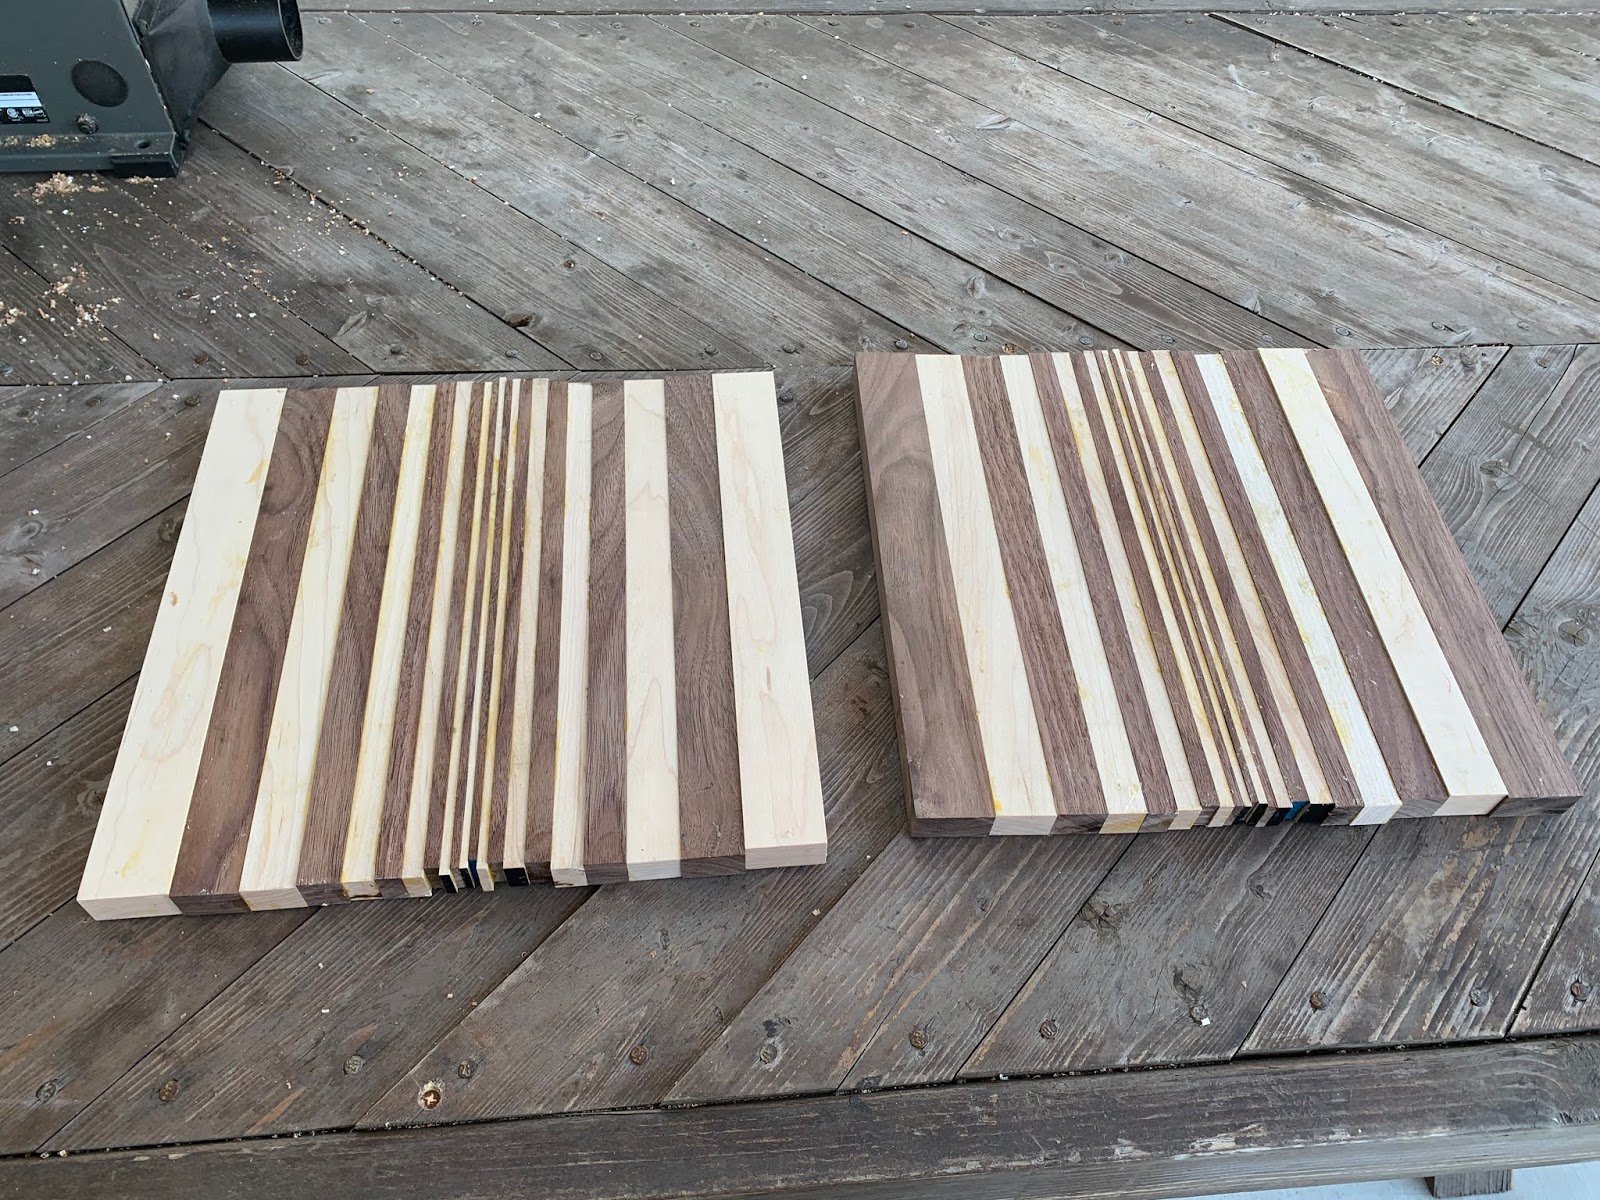
Today was the last day of the Advanced Woodworking A-term and for us seniors the last day of Post Oak J/A Terms as a whole... On another note, I finally finished my cutting board! I had to veer a little from the original design but all in all, I am very happy with the final product and learned a lot in the process. I started the day by gluing the handle back onto the cutting board with the longer clamps at school. This glue-up called for an additional extremely long waiting period for the glue to dry. Since I couldn’t finish my project just then I spent the morning roaming around the Tinkeria, watching Sutton try to saw off the excess wood from her project, and even started making the A-Term Presentation slides in an attempt to make the glue dry faster. By the time we finished our lunch break, my cutting board was dry enough for the next step. Recalling yesterday’s incident, I hesitantly approached the router again. Mr. Grisbee wisely decided to stand on the left side of the router thi

Day 8 - Sutton

Image
Well, let it be known to all that A-Term 2021 is officially over which means I have one A-Term left in my entire life. What a heavy thought to end the day.  My last day of the Advanced Wood Working course started at 8:30am on the dot as there was absolutely no time to waste. My first task was to use a tiny, thin saw to chop the excess Babinga wood off of the splined miter joints. This grueling process was most definitely the worst two hours of my life, and that is coming from the same girl who had also gotten her first fender bender in front of the entire high school two days before. It was truly awful. When Mr. Grisbee was demonstrating, he looked like he was cutting butter and made it seem so smooth and simple. When I tried, however, it was like I was chopping into solid graphene (which, if you didn't know, is the strongest material in the world). Not only this, but I had to stand outside in the 100% humidity while wearing a mask and a very thick t-shirt. Mr. Grisbee kept telling

Day 8 - Photos (ALL)

Image
 

Day 7 - Catherine

Image
Between design changes, planing, working with new power tools, and all of the accidents in between, it was quite a day. The first thing when I walked into the Tinkeria this morning was to check to see if the pieces had gotten any straighter. They did not. However, I was able to flip some of the pieces in a way that their uneven edges fit perfectly together and created a board that is straight –to the unsuspecting naked eye. I then glued all of the pieces of the board together. Interestingly enough, even though I removed several of the middle pieces from the original pattern, my board was still a 13”x13” square. As I was gluing the board, another piece broke off and I spot glued it but apparently not well enough because there ended up being a millimeter gap in between that the glue had already set in place. There was also one piece that jutted out significantly higher than the rest and could not be fixed either. I wanted the board length to be 12” with a decent-sized handle which meant

Day 7 - Sayer

Now the last blog implied that the project was done, but it wasn't, the primary assembly was done. Day 7 was relegated primarily to tidying it up and applying edge banding. Which is a lot harder than you'd think. You have to press down a thin veneer with a hot iron and if you screw it up by any more than 1/16" you gotta do it again loser. I used probably double the material I needed to due to stupid mistakes, but it doesn't matter, I got it done eventually.      Once the edge banding was finished, I needed to do one of the final steps, sanding the whole thing down. This was probably the most stressful step and a lot of the edge banding was screwed up by my imprecision or tendency towards mistakes in general. However, that step was finished with the shelf intact and thank god for it because that was stressful. I was sorta left to myself for a good while until it was finally time to attach the backing. Now the backing was cut from this massive floppy 1/8" plywood bo

Day 6 - Sayer

 Day 6 was a day spent making a lot of progress on the shelf. The primary thing that was done for the majority of day 6 was rabbet adjustment. A lot of my rabbets were mediocre at best and needed to be trimmed down to size. After a lot of sanding and utilization of the router table, my rabbets were fixed. After that, I needed to use the router table for something else. So my shelf was designed to have a 1/8" backing, so we needed to cut out a hole to fit that backing into. the router table would allow me to cut a rabbet into the wood so I could fit the backing on there. However as it just so happens my brain is small and I am stupid, so I cut on the wrong side. This major mistake was noticed by Mr Grisbee and I a few seconds after it was done, we decided it might just be better to saw off that little chunk that I did and shorten the shelf by 1/8". This was relatively easy to do so we did it. After that came lunch. Once lunch ended it came to the ultimate final act of the day,

Day 7 - Sutton

Today was full of adventures, accidents, "aww man's," and adjustments to the design of my dog bowl stand. A lot happened over the past seven hours, and I will fill you in as best I can.  Immediately after setting down my belongings, I untaped the joints of the dog bowl stand. The miter joints turned out as well as humanly possible and, with a little glue, sawdust, and sanding, they will look great. I then measured the inner side of the stand so I could trim down the maple piece. I used the table saw and carefully made my cut. I ended up needing to go back and trim it down hair-by-hair so that it slid in perfectly. Somehow, I trimmed it one hair too many, and now there is a slight gap on the side. This may seem like a slight problem, but it will seem like nothing when you compare to the other drama I will explain shortly.  I then spoke with Mr. Grisbee about enhancing the upper portion of the stand so that the maple piece is slightly inward and has a curve. I chose my favo

Day 7 - Photos (ALL)

Image
 

Day 6 - Catherine

Image
We are down to the last 3 days of A-term which means we will be finishing up all of our projects soon! This morning I prepared my final cut list for the cutting board. This time I have to cut 11 pieces out of the 1st panel (the one with walnut on the ends) and 10 pieces out of the 2nd panel (the one with maple on the ends). I started with the 4mm cut, the thinnest one, and then continued the cuts in increasing thickness as listed on my cut list. Out of the 21 pieces, I only had four pieces that broke in two which was actually pretty good. I had some extra leftover from both panels so I was able to recut some three of them but the 10mm strips continued to break and I ran out of wood so I had to spot glue them together. This was just the beginning of my breakage issues. Some of the pieces were so delicate that they broke when I moved them to a different table, and then some more broke when I left them in the sun over lunch. Since everything decided to collapse I decided not to risk the p

Day 6 - Sutton

Day 6 was quite a day.  I made significant progress on the dog bowl stand and feel confident that I can finish it by Wednesday. Hallelujah. The first thing I did in the morning was use the Tinkeria's brand spanking new circle jig. You basically attach this gadget to the router, plunge it into the wood, and - abracadabra - it cuts out a perfect circle. It quickly became my favorite tool since it is relatively easy to master and it is so satisfying. Scrap the "vacuum therapy" idea from my other blog - circle jig therapy is definitely the way to go. Before using the tool on my real piece of wood, I worked with Mr. Grisbee to do a practice circle cut on a scrap piece of wood. When that circle was a success, I moved on to complete my two real circles independently. Luckily, there was no drama or danger and I was left with a board that had lost a lot of weight (because of the missing circles). I then used the table saw to make miter cuts so I could attach the legs to the top bo

Day 6 - Photos (ALL)

Image

Day 5 - Catherine

Image
This morning I removed my two panels from the clamps and found that a ton of glue had dried and stuck onto the clamps in the process. I had to use a chisel and special solvent that smelled severely of oranges to scrape of the glue. Once that was done, I used the cross-cut sled and table saw to trim the sides of the boards to create a straight edge and size that would fit through the planer which has a max-width of 12.5”. I then was able to get the more fun and most satisfying part: planing the boards. Because the planer was now working against the grain, it was shaving off long straw-like strips instead of the usual sawdust and wood chips. This jammed up the vacuum so much that I had to disconnect it and then Sutton had to stand on the other side of the planer and hold the vacuum to gather all of the strips. As the panels were planed the vacuum would catch all of the strips at the tip but they wouldn’t actually go through so then we had to manually take it off the vacuum end and put it

Day 5 - Sutton

Today was rather slow compared to yesterday’s intense productivity and action. My ears and and lungs, however, were thrilled to catch a break from the constant screeching of power tools and heavy clouds of sawdust.   The first task I completed in the morning was resizing my mermaid tail diorama on Adobe Illustrator for a special commission piece. That’s right - my J-Term creation is becoming the next hot commodity. I then used the table saw to cut my legs (for the dog bowl stand). Since my boards are actually two boards glued together, Mr. Grisbee showed me a method for making sure the seam stays centered after I make my cuts. I have about a three foot vertical disadvantage compared to him, so at times, it was challenging to determine if the seams were aligned from a birds-eye view. Being the determined girl I am, I persevered and successfully completed the cuts to near perfection all by myself. Next, I used the planer to ensure every piece of my wood was the same thickness which is es

Day 5 - Sayer

 Today was another rather nice experience because we got a [REDACTED]load of stuff done on the shelf, with enough break time in between to not have it get grating like Thursday was. We started the day out with dado-ing the remaining few that needed to get done. After that was done I tried to fit everything together, and it didn't work on one end. So we removed some of the veneer and tried again, it didn't work, so we removed even more of the veneer, and it worked. It worked so well that it almost got stuck. Which would've been pretty bad. Now, all we have to do for the main shelf body is remove some of the wood from the back to make the backing fit better, actually cut out the backing itself, and stick it all together. After that we need to cut out the felt, place it on the spots, make it look nice, apply the edge banding, and make the holders. The holders will be pretty cool, and will also probably have some form of a design laser cut onto the sides of them. Oh right the o

Day 1-3 Nathaniel

  Sorry this post took so long to get out, but my week has been quite hectec. On day one, I was unable to attend in person due to it being the last of my quarantine, but I still woke up bright and early ready to make a project. Previously I had thought about what type of project I was aiming for, namely a smaller and more intricate utility-based project, I did not want to make something that would just be there but something I could use and take with me to college, in my brainstorming, I thought through many ideas including a clip-on desk cupholder, a card box/organizer, and briefly, a trebuchet. In the end, I finally settled on building a dice tower. This would be a tower structure with interior slats that would fully randomize the dice rolling them. I would also implement a storage system to keep dice in the tower for role-playing games for quick and easy use. After drawing a very not-to-scale model of what I wanted and discussing with Mr. Grisbee I had to duck out for my vaccine app

Day 5 - Photos (ALL)

Image

Day 4 - Sayer

 Thursday.... For better or for worse today was a busy day, most of the day was spent with the buzzing of the loudest power tool made by human beings in the background. I forget it's name but oh my god it drowns out everything else, even thoughts. But that's just me complaining, on my end today was spent primarily doing dado work. By that I mean I was cutting channels in a lot of my finalized cuts. The major things I cut were the rabbets on the side, as well as the channels for the wood to slot into to make the actual shelf compartments. Now let me tell you, mulching a solid 3/8"x3/4" channel through plywood creates a lot of dust, now that isn't exactly the worst thing, I don't have a problem with some sawdust. The problem comes when there's more than just some sawdust, it was all-encompassing, how on earth did that must dust come out of a single piece of wood. I could probably bury myself in it. Anyways after getting hot sawdust blown down my jacket sleev

Day 4 - Catherine

Image
Today was a very productive woodworking day as I finally finished all of my cuts and got to do my first glue up. It was a slow start though because Nathaniel and Sayer also had to use the table saw for their projects so I spent the morning catching up on the daily blogs while I waited. I also went around and took a few photos for the blog and had fun watching the other students do their projects. We are all doing very different projects so it is cool to see how other people’s projects are coming together. After lunch, the table saw was free so I was able to cut the other 20 strips. Towards the last few cuts, I ran out of maple. I had lots of extra maple but it was not cut to 13” like my other strips and I still had to do one more cut at the same thickness so I couldn’t adjust the fence just then to make the maple shorter. I was able to finish cutting the pieces with the longer extra maple but I then had to do cross cuts to get the pieces to the correct length. I made the mistake of run

Day 4 - Sutton

From the perfect weather to the pleasant drone of power tools, today was rather awesome.   As I walked through the door to the Tinkeria, I was immediately bombarded by questions from Mr. Grisbee about my cord wrapping practice. Clearly, he was not concerned with concealing his fear and intimidation. He told me that it took him many years to master the technique, so I shouldn’t be worried. P.S. I was not worried.   I then checked on my boards and determined they were successfully stuck together. I detached the clamps, used sand paper to brush off some glue stains, and marveled at the beauty of my creation. Since Sayer was hogging the table saw and Mr. Grisbee’s attention, I was forced to wait and contemplate how I was going to achieve the mountain cut-out affect on the sides of the dog bowl stand. I had just about finished an awful gameplan (but a gameplan, nonetheless), when Mr. Grisbee said I could use the table saw to cut down my boards. We ran into a slight challenge since one of my

Day 4 - Photos (ALL)

Image